- Published on
Generating GLS Shipment Labels with Base64 Encoding
Viewed
times
- Authors
- Name
- Introduction to Base64 Algorithm
- Generating GLS Shipment Labels with Base64 Encoding
In our previous article, we explored the fundamentals of Base64 encoding and its general applications. Now, let's take a closer look at how this encoding technique is applied in a real-world scenario: creating shipment labels with the GLS ShipIT API.
To perform the operations described in this article, you’ll need access to the GLS credentials and API endpoint URLs. If you do not have access, you can try out the sandbox version from the GLS Developer Portal at https://dev-portal.gls-group.net/get-started#sign-in. Please note that the sandbox version may have limited functionality.
Introduction to GLS ShipIT API
GLS (General Logistics Systems) is a parcel delivery service provider operating across Europe. Their ShipIT API provides several operations via a REST API, allowing developers to integrate GLS shipping services into their enterprise systems, such as ERP systems. This integration enables the automation of parcel-related use cases, including creating and tracking parcels, finding parcel shops near a consignee's location, and retrieving proof of delivery documents.
Authentication and Label Generation
To interact with the GLS ShipIT API, we must first authenticate our requests. This is done by sending a valid username and password encoded in Base64 format. Below is a step-by-step guide on how to authenticate and generate a shipment label.
Step 1: Authentication
The GLS API uses HTTP Basic Authentication, which requires the credentials to be sent in a specific format. Here’s how to do it:
import requests
import base64

# User credentials
username = "restuser"
password = "secret"

# Encode credentials in Base64
credentials = f"{username}:{password}"
encoded_credentials = base64.b64encode(credentials.encode()).decode()

# Set up headers for the request
headers = {
    "Authorization": f"Basic {encoded_credentials}",
    "Content-Type": "application/json"
}
In this snippet, we combine the username and password into a single string and encode it using Base64. The resulting string is then included in the Authorization header of our request.
Step 2: Generating a Shipment Label
Once authenticated, we can create a shipment label by preparing the shipment data and sending a POST request to the GLS API. Here's how to do that:
# Shipment Data
shipment_data = {
    "Shipment": {
        "Product": "PARCEL",
        "Consignee": {
            "Address": {
                "Name1": "Ratan Tata",
                "CountryCode": "DE",
                "ZIPCode": "80339",
                "City": "Munich",
                "Street": "Landsberger Str. 110"
            }
        },
        # ... other shipment details ...
    }
}

# Make API post Request
response = requests.post("https://api.gls-group.eu/public/v1/shipments",
                         headers=headers, json=shipment_data)
Step 3: Processing the Response
After sending the request, we need to handle the response. If the request is successful, the API will return a Base64 encoded PDF (or a PNG label, depending on the request). Here’s how to decode and save it:
# Process Response
if response.status_code == 200:
    label_data = response.json()["CreatedShipment"]["PrintData"][0]["Data"]
    with open("gls_label.pdf", "wb") as f:
        f.write(base64.b64decode(label_data))
    print("Label created successfully!")
else:
    print("Error creating label:", response.text)
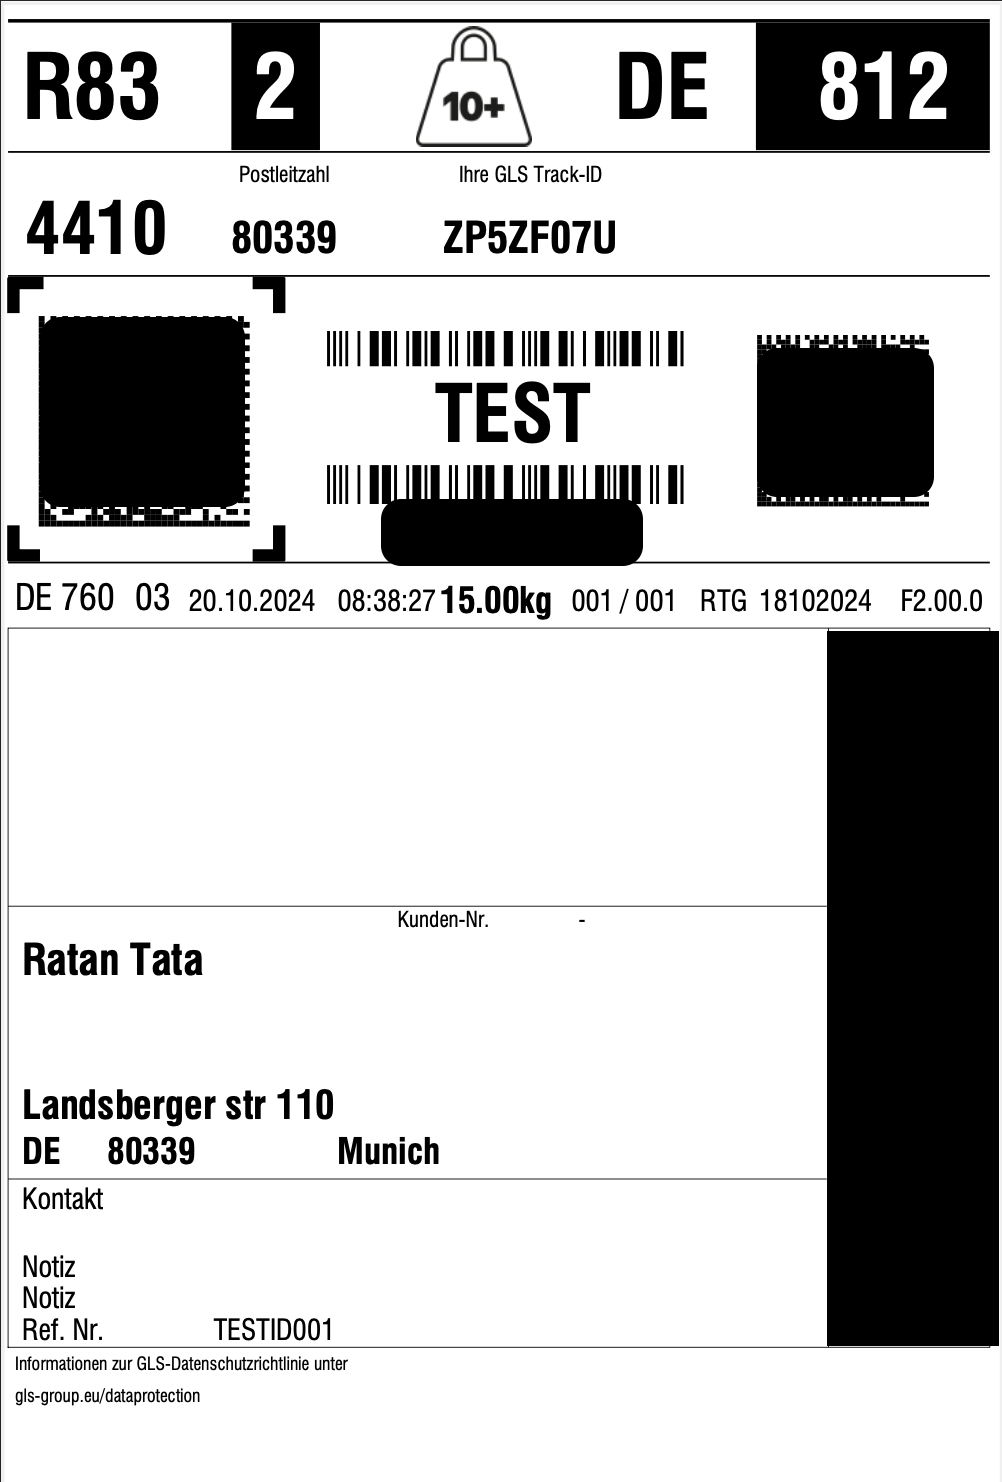
Sample Label Generated
Below is a sample shipment label generated through the GLS ShipIT API. It contains the details that we provided in the Shipment like name, address, and parcel details.

Fig: GLS label without custom logo;
Adding a Custom Logo to the Shipment Label
Now, let’s take it a step further and see how we can add a custom logo to our shipment label. This is a great way to personalize your labels and maintain your brand identity.
Step 1: Prepare Your Logo
First, make sure that your logo is saved as an image file (e.g., PNG or JPEG). For this example, let's assume we have a logo named company_logo.png.

Fig: company_logo.png | ❤️ open source
Next, we’ll encode this image in Base64 format. This is how you can do it in Python:
# Step 1: Encode Custom Logo
with open("company_logo.png", "rb") as image_file:
    encoded_logo = base64.b64encode(image_file.read()).decode()
This code reads the logo file in binary mode and encodes it into a Base64 string.
Step 2: Add the Logo to the Shipment Data
Now that we have our logo encoded, we can include it in the shipment data. Below is an example of how the shipment data might look with the custom logo:
# Complete Shipment Data with Custom Logo
shipment_data = {
    "Shipment": {
        "Product": "PARCEL",
        "Consignee": {
            "Address": {
                "Name1": "Ratan Tata",
                "CountryCode": "DE",
                "ZIPCode": "80339",
                "City": "Munich",
                "Street": "Landsberger Str. 110"
            }
        },
        "CustomContent": {
            "CustomerLogo": encoded_logo  # This is where the encoded logo is included
        }
        # ... other shipment details ...
    }
}
Step 4: Make the API Request Again
With the custom logo added, you can now make the API request. The GLS API will generate a label featuring your custom logo.
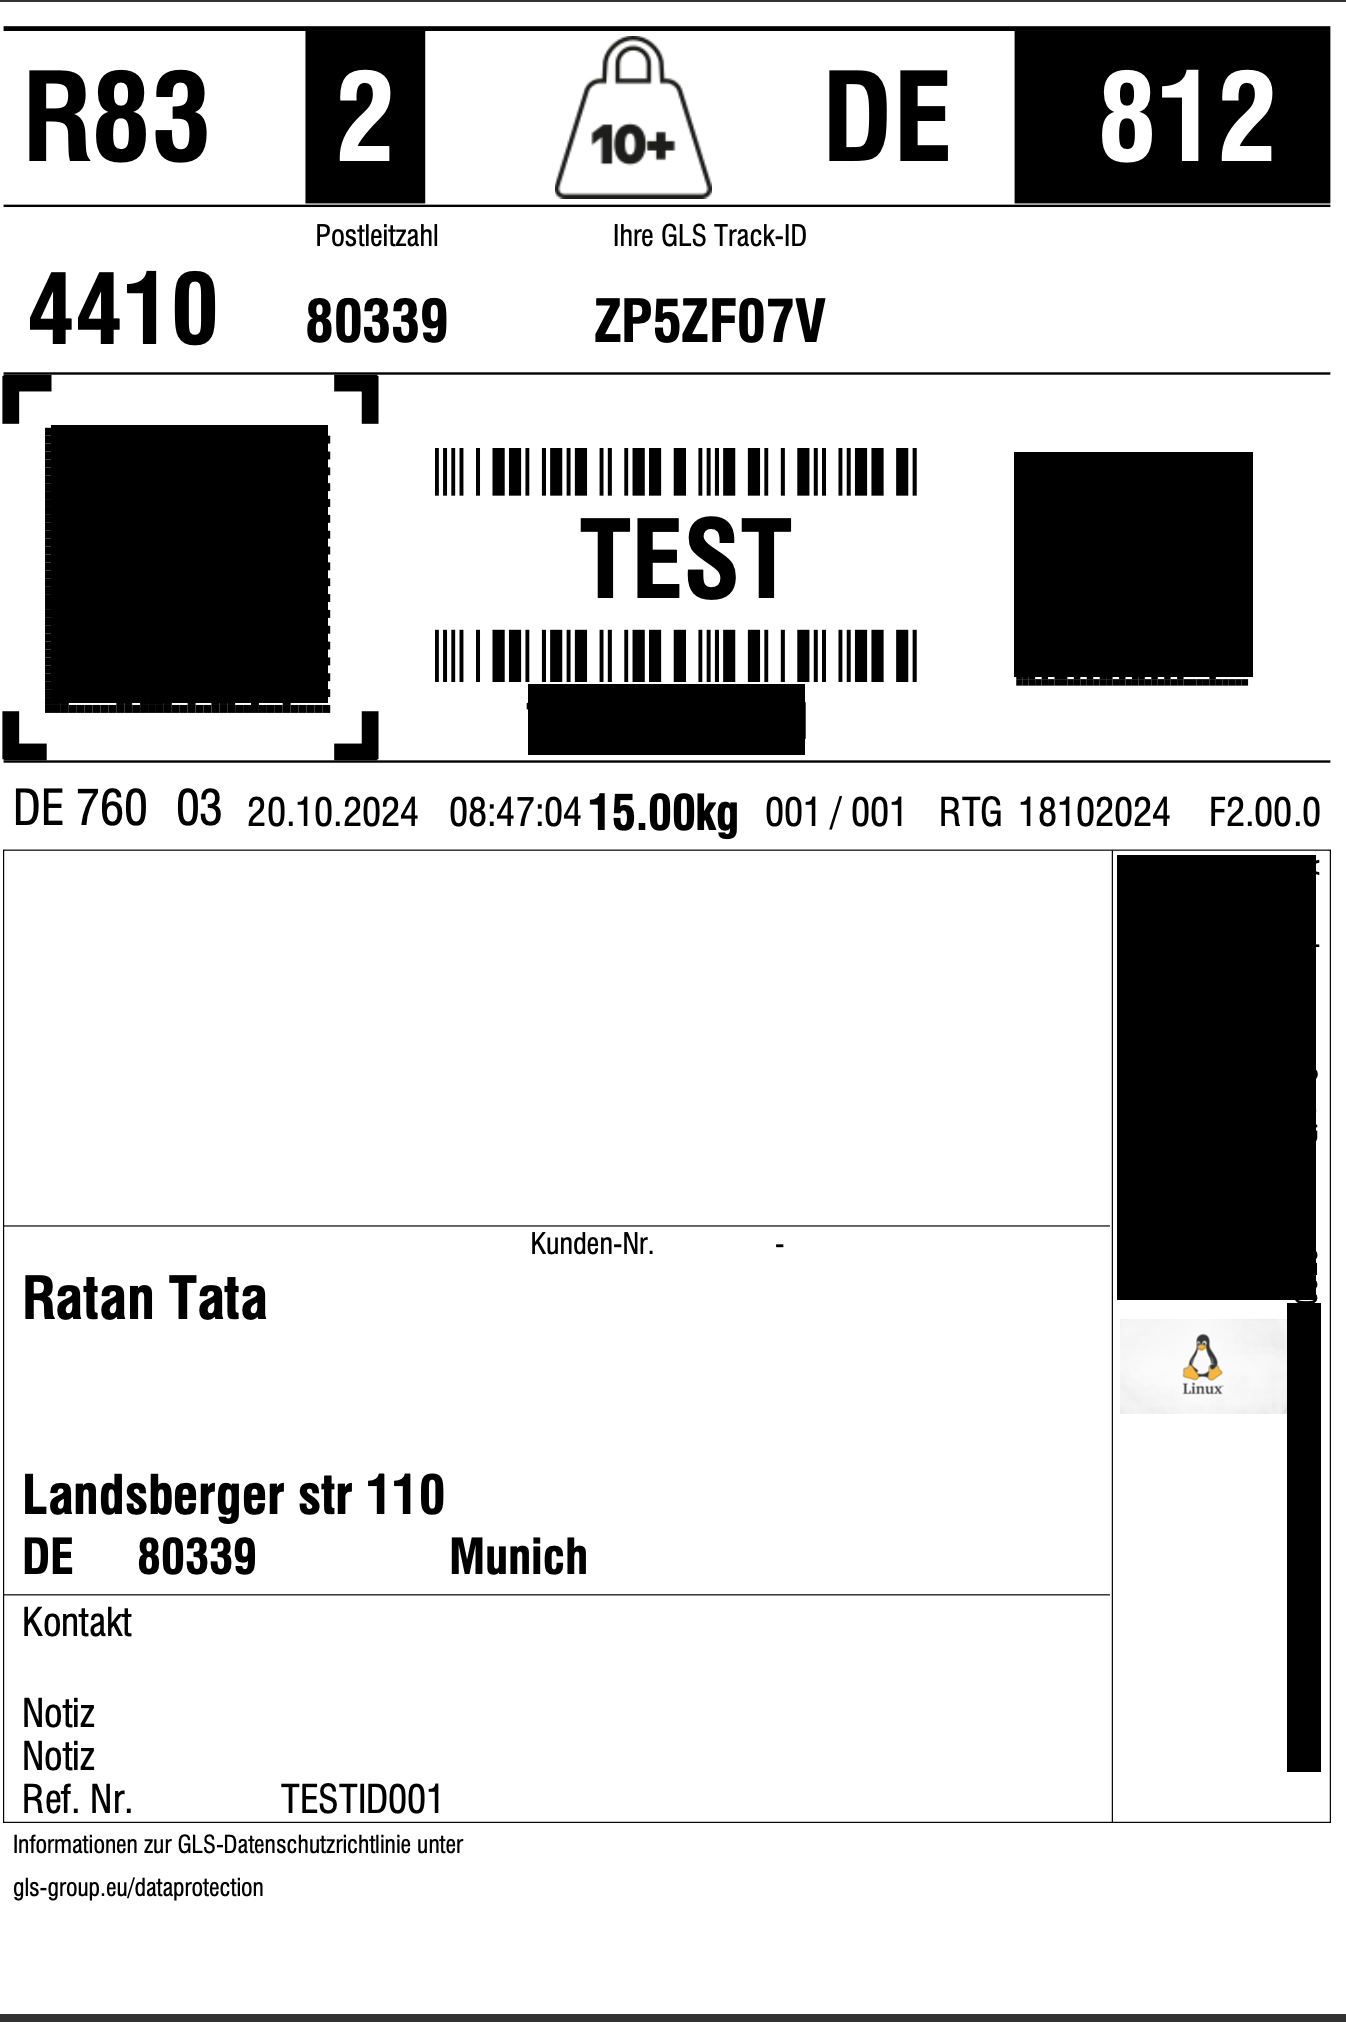
Sample Label Generated (With Custom Logo)
Here’s how the end shipment label with our custom logo looks like:

Fig: GLS label with custom logo;
To wrap up, the GLS ShipIT API provides a practical way to manage shipping tasks, including generating shipment labels. By utilizing Base64 encoding for authentication and custom logos, developers can easily automate label creation while ensuring their branding is included. This process helps to streamline logistics and improve label consistency.