- Published on
Power Automate: SharePoint Files Sync to windows devices
Viewed
times
- Authors
- Name
SharePoint and Power Automate are software products from Microsoft, designed to help organizations manage content, collaborate, and automate workflows.
In this tutorial we will develop and test a Power Automate flow to synchronize the files present in a given folder in Sharepoint to a Windows device. During development, We will also briefly go though different types of flows, actions, expressions in Power Automate.
SharePoint and Power Automate are constantly evolving, so you might see a different user interface than shown here in the pictures.
Prerequisites
- Windows Machine with administrator privileges (to install on-premises data gateway)
- Sharepoint and Power Automate accounts
- a Sharepoint site
Install an on-premises data gateway
First we need to Install an on-premises data gateway 1 on our Windows Machine. This gateway acts as a bridge to provide quick and secure data transfer between Sharepoint and our windows device.
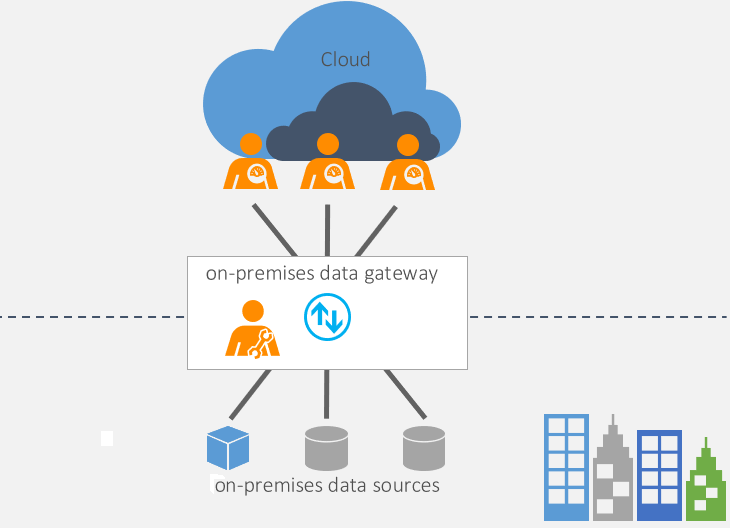
Fig: How gateway works; source: Microsoft
On-premises data gateway architecture
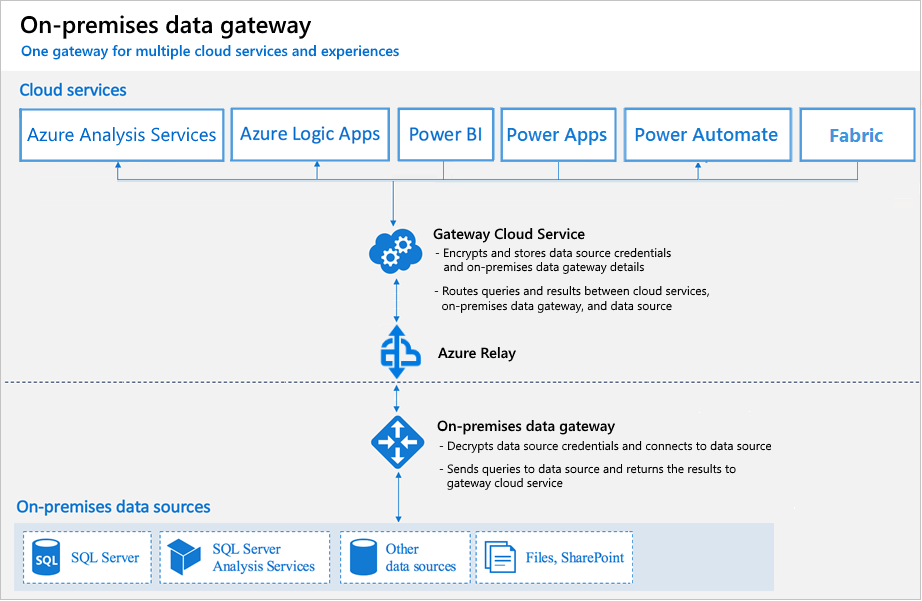
Fig: How gateway works-in detail; source: Microsoft
Microsoft provided a nice article 2 with a detailed installation instructions. Follow these instructions and install on-prem gateway on your windows machine.
While configuration, Make sure to notedown the name of the on-prem gateway that you provided. We need to provide it later on in the Power Automate flow.
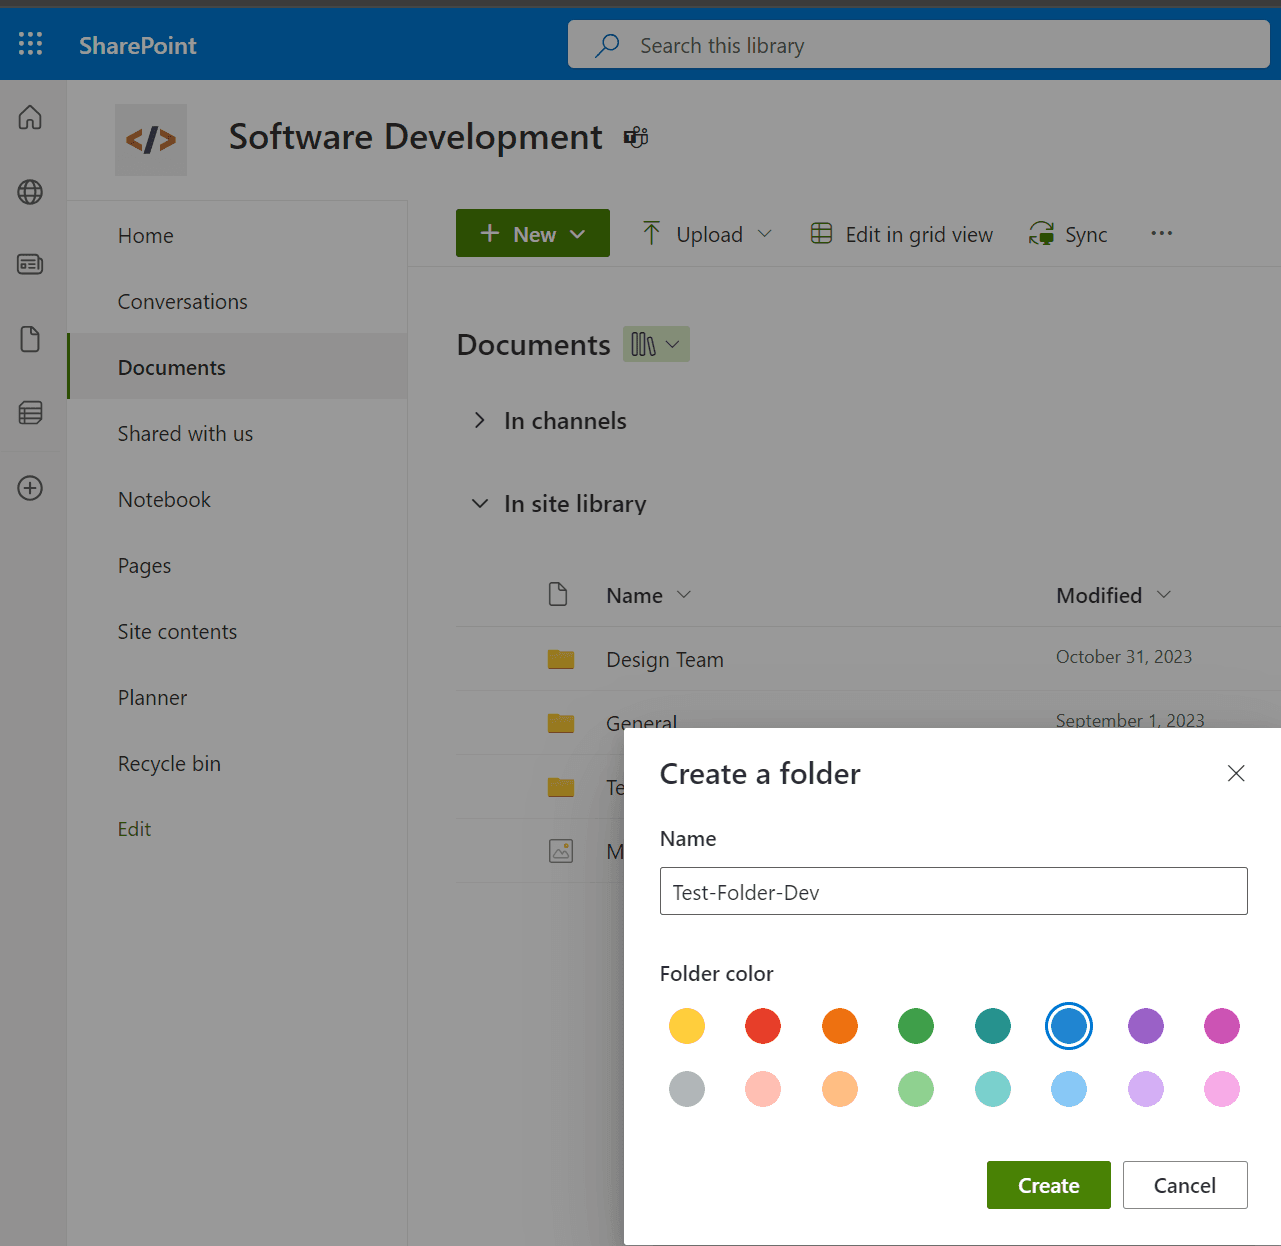
Sharepoint: Create a folder and upload (or create) files into it
I have a Sharepoint site called Sofware Development . Let us create a folder inside this Sharepoint site under Documents folder. I named it as 'Test-Folder-Dev. Let us upload (or create) few test documents in this folder.
Folder and files creation: screenshots
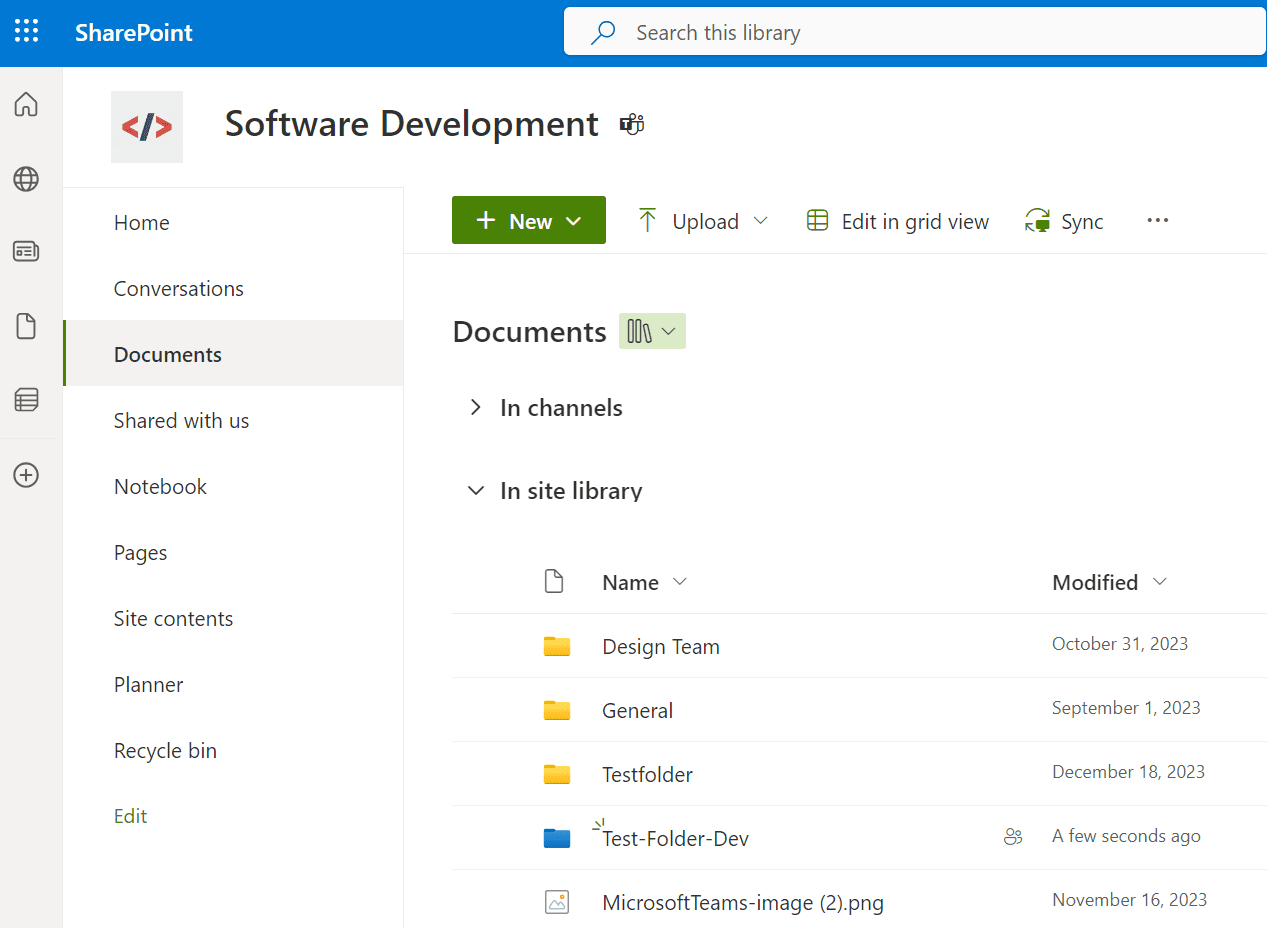
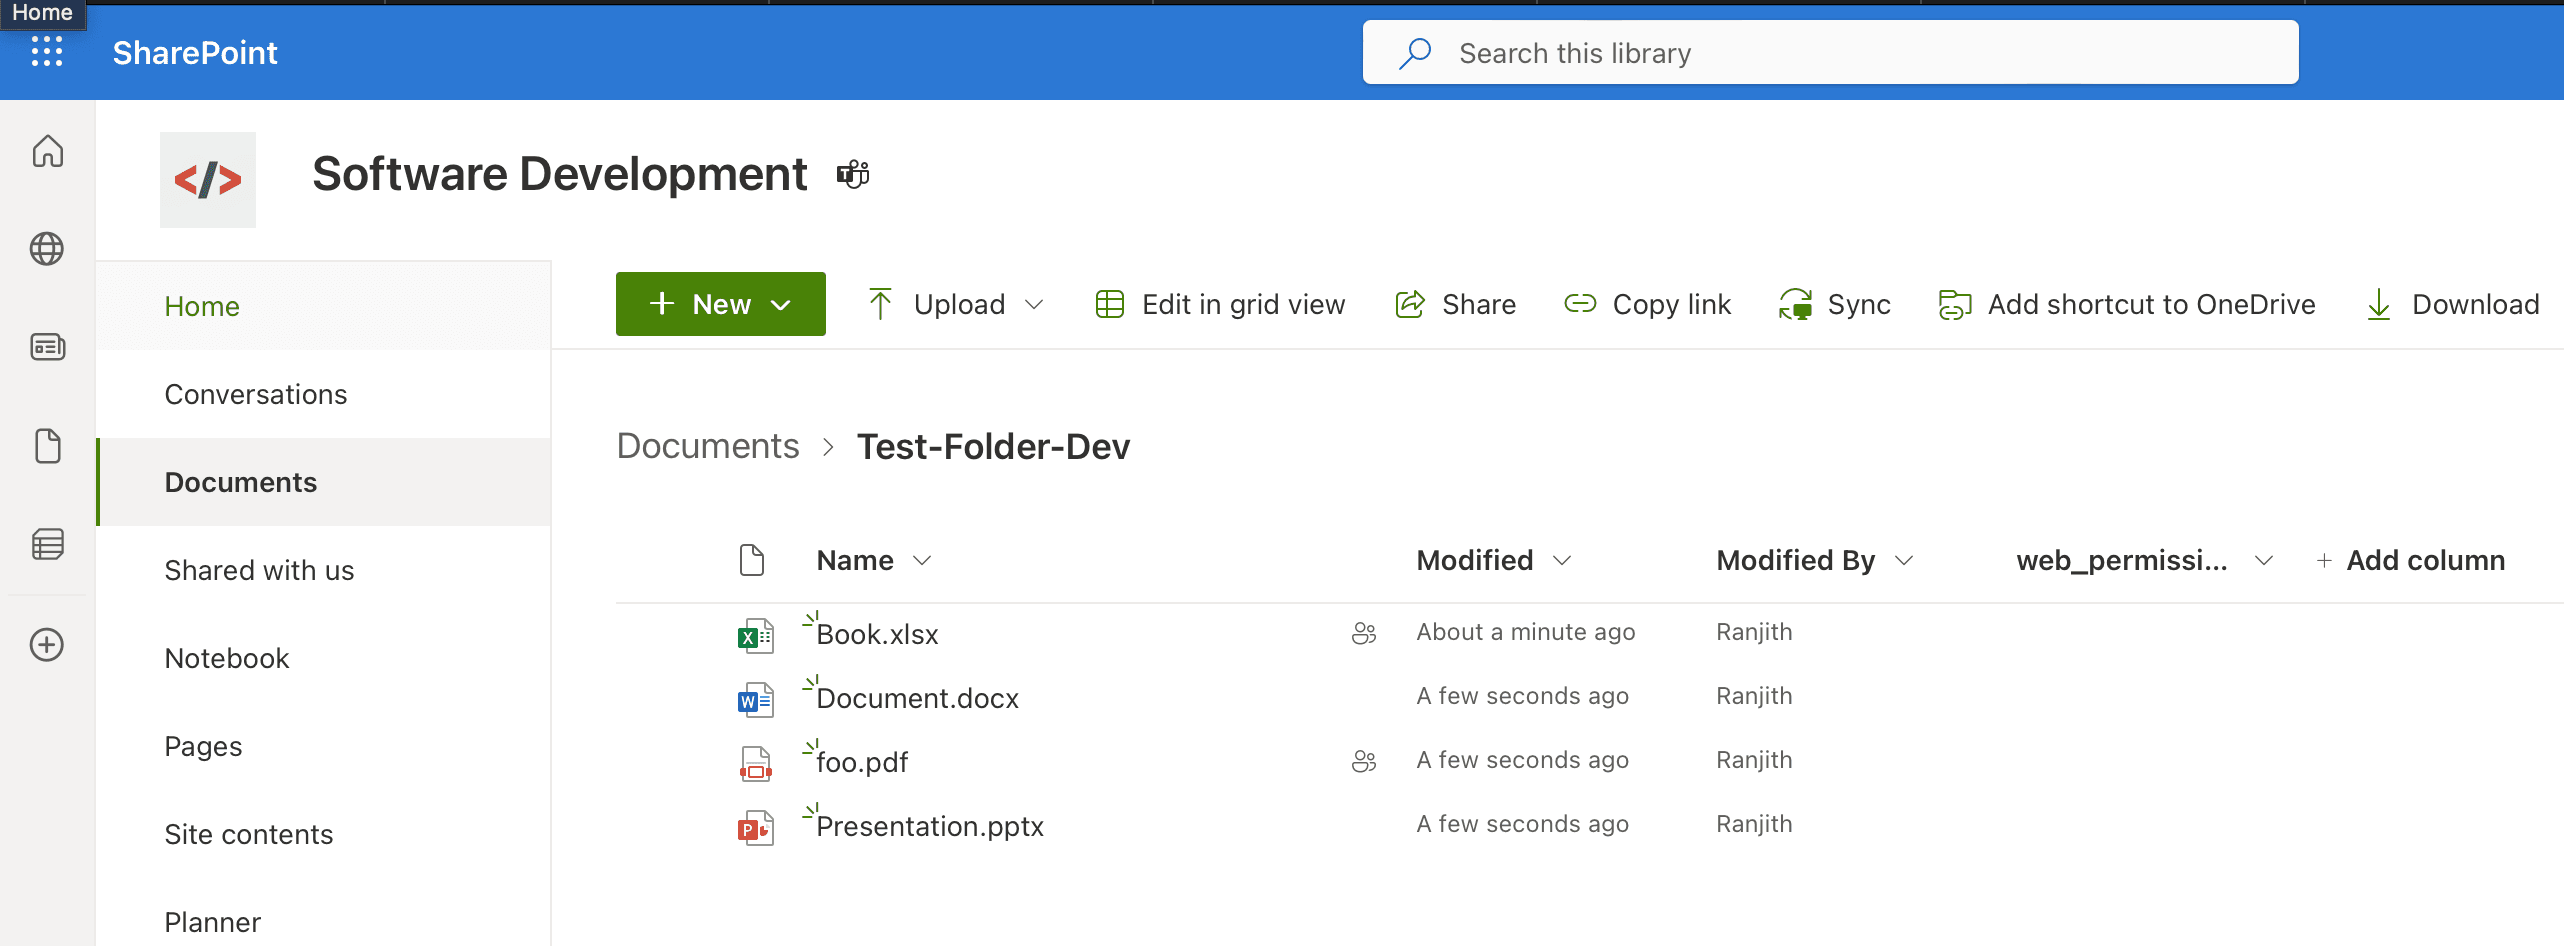
Once the files are created/uploaded, here is how the end folder structure looks like:
- Documents
    - Test-Folder-Dev
        - Book.xlsx
        - Document.doc
        - foo.pdf
        - Presentation.pptx
Now that we have gateway installed and setup Sharepoint folder containing files, let us create a Power Automate flow to sync these folders to our windows device.
Power Automate Flow
Getting Started with Power Automate
Let us navigate to the Power Automate homepage. Upon clicking create button on Navigation menu, we will see various types of flows one can create, such as automated, instant, and scheduled flows.
If you're an absolute beginner to Power Automate and is looking for a comprehensive introduction to the platform, check out: https://learn.microsoft.com/en-us/power-automate/getting-started
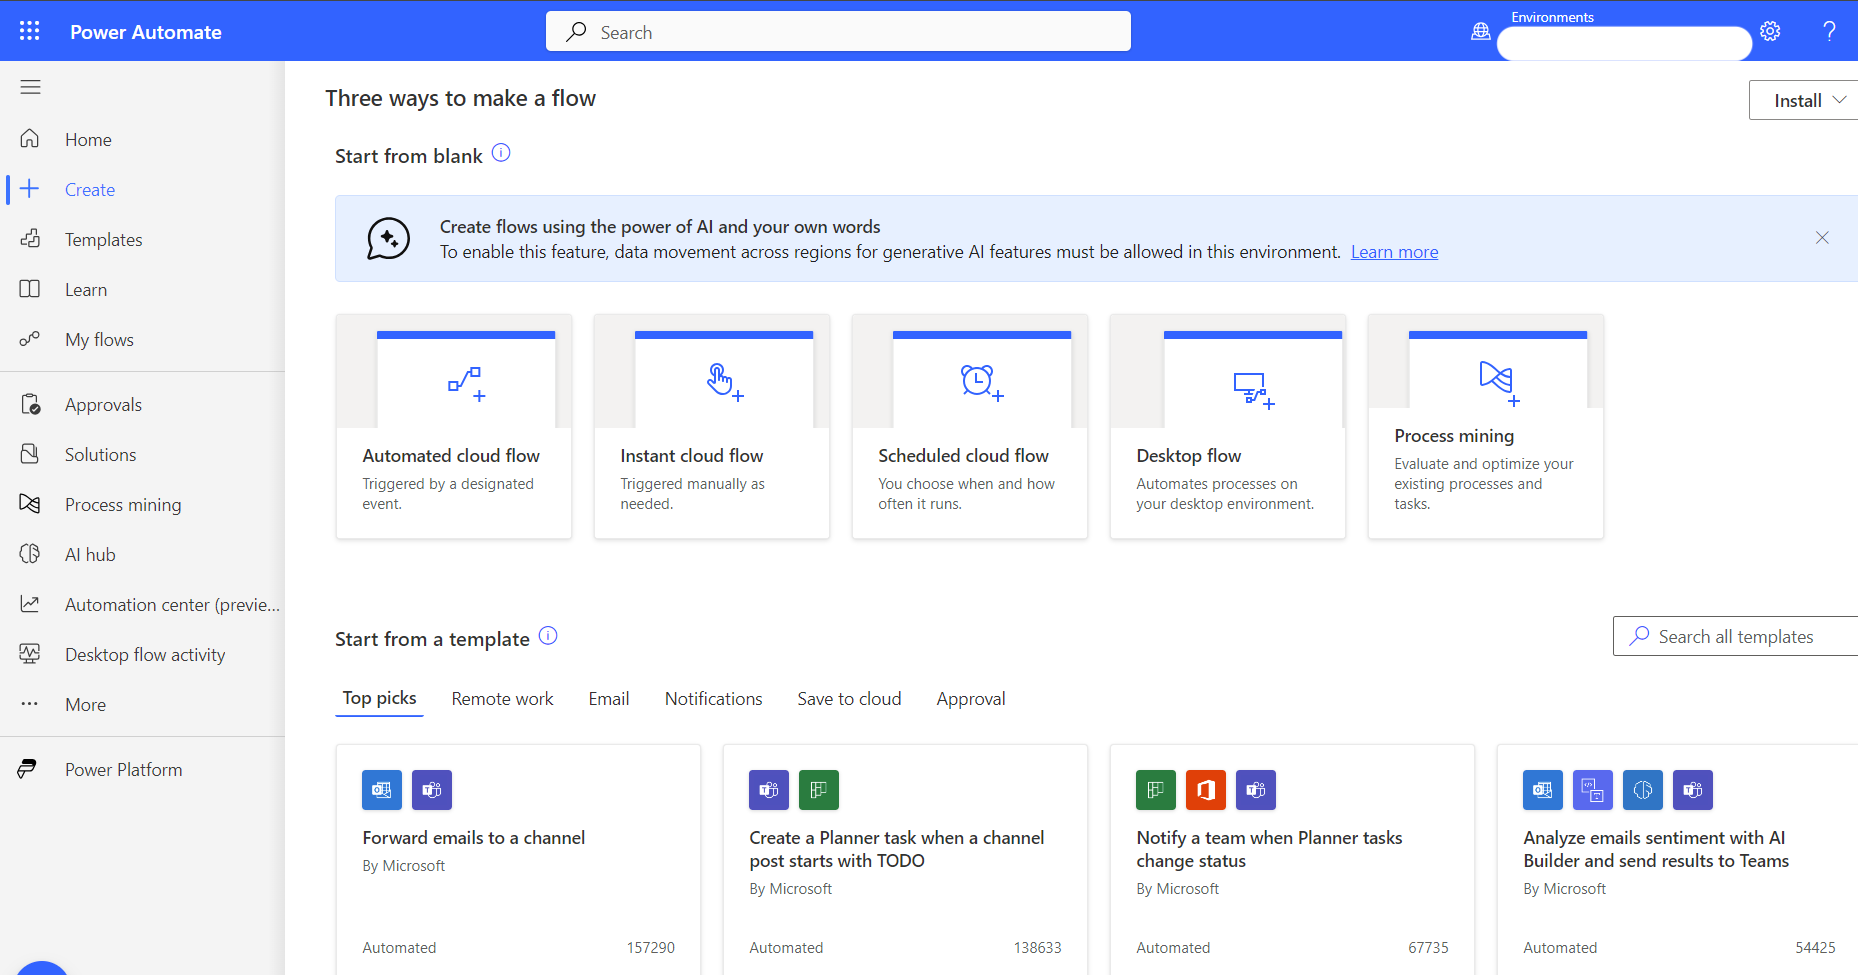
Fig: PA Different Flows
For our purpose, we'll create a scheduled flow to periodically sync our SharePoint files.
Creating a Scheduled Flow
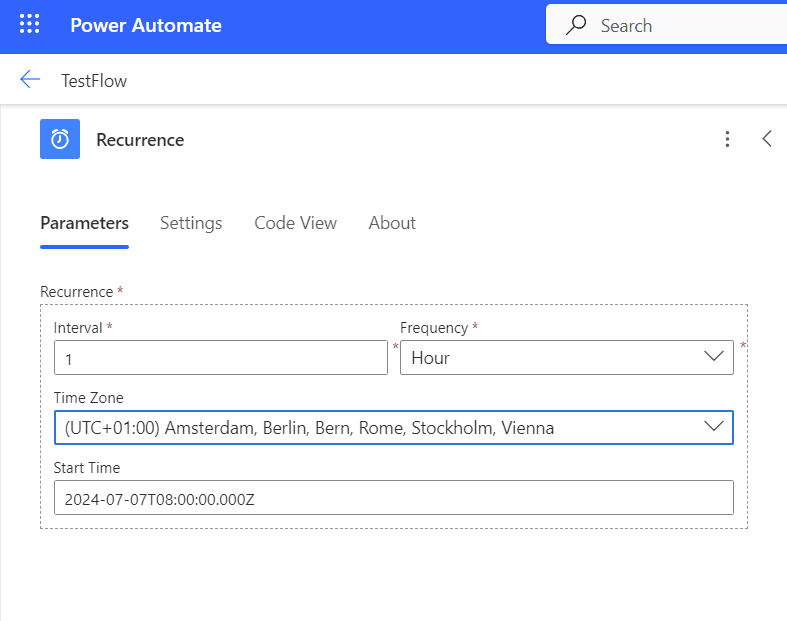
click on select "Scheduled flow". Let us give the flow name as TestFlow and set the recurrence pattern as 1 hour.
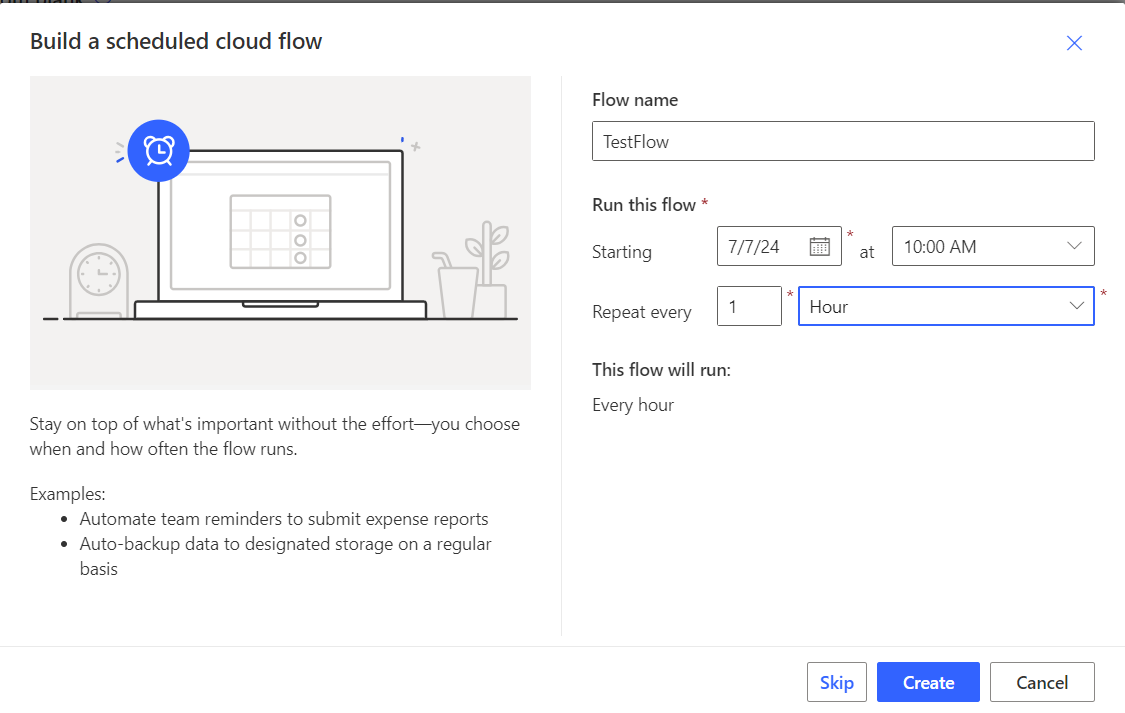
Fig: Create Scheduled Test Flow
After clicking on create, we'll be taken to the flow designer. This is where we'll add the necessary steps (actions) to sync our files.
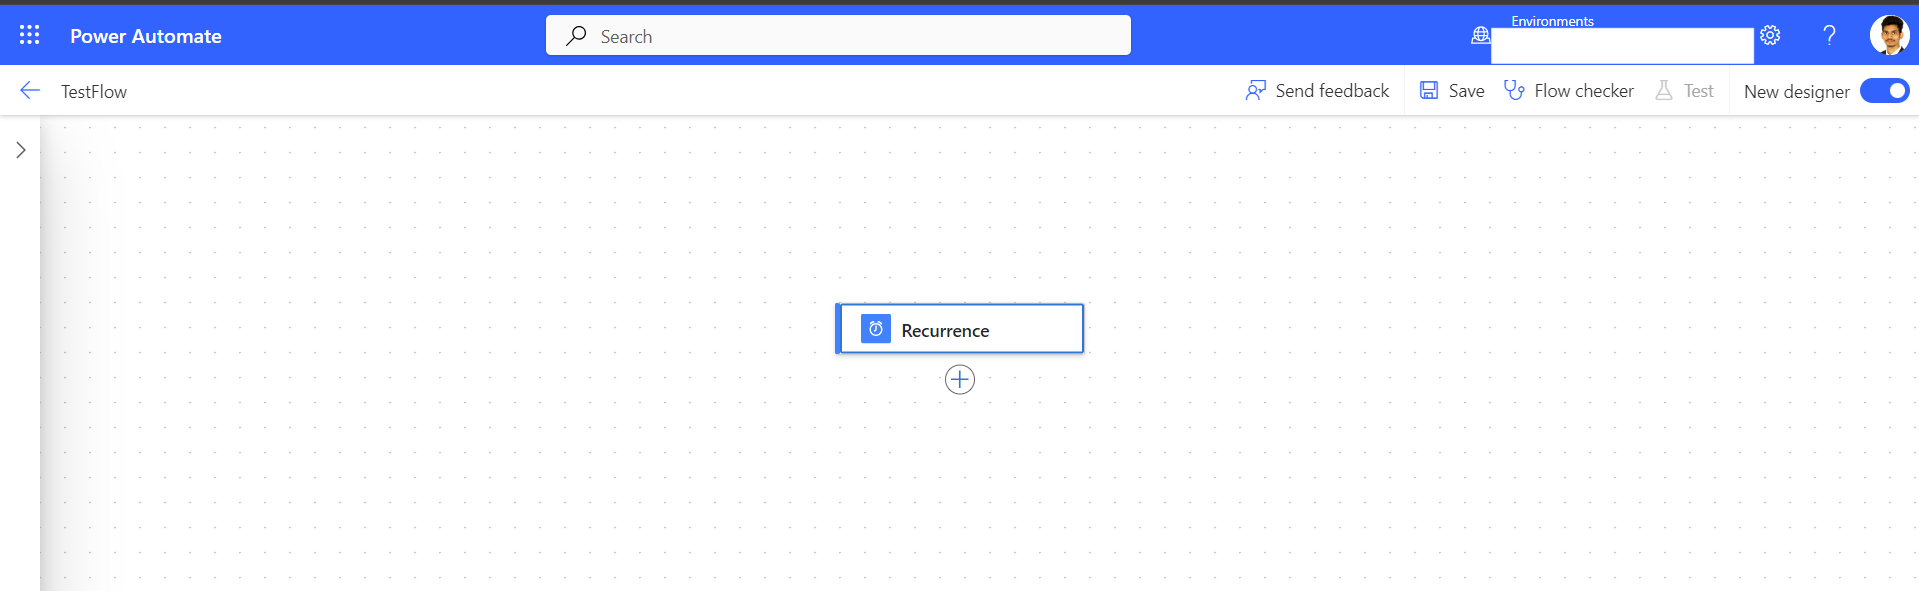
Fig: Test Flow Designer (new)
Setting Up Recurrence
The first step in our flow is already set up - the recurrence trigger. You can adjust the parameters to control how often the flow runs.
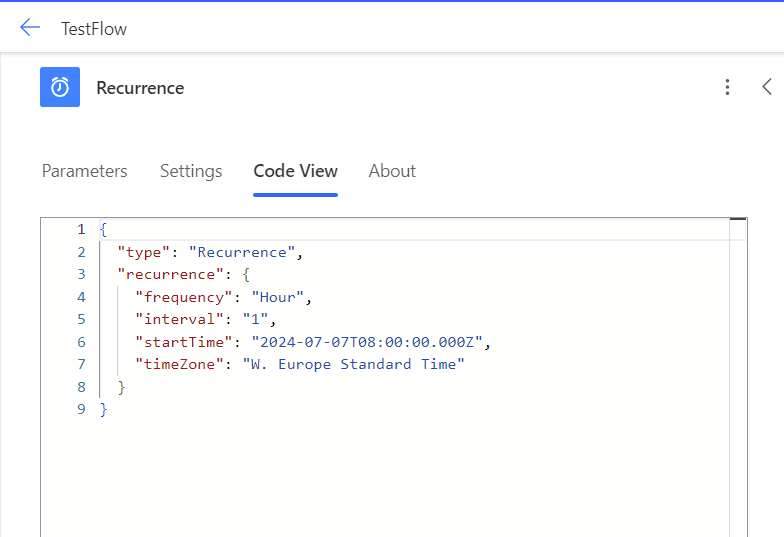
Power Automate offers both a visual designer and a code view for each action. The code view can provide more detailed information and is useful for troubleshooting or advanced configurations.
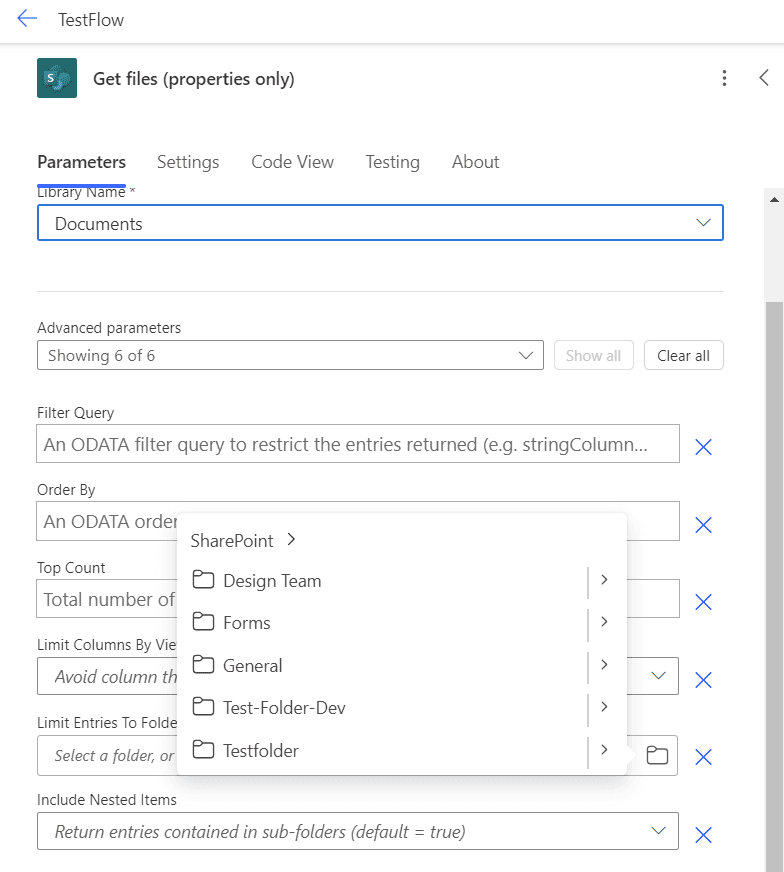
Get SharePoint File Properties
Next, we need to add an action to get the properties of the files in our SharePoint folder. Power Automate provides a convenient way to add actions, similar to a marketplace.
- Click on "+" below recurrence trigger in Flow Designer.
- In the search bar that appears, type "Get file properties". This search functionality acts like a marketplace, allowing us to find and add various actions to your flow.
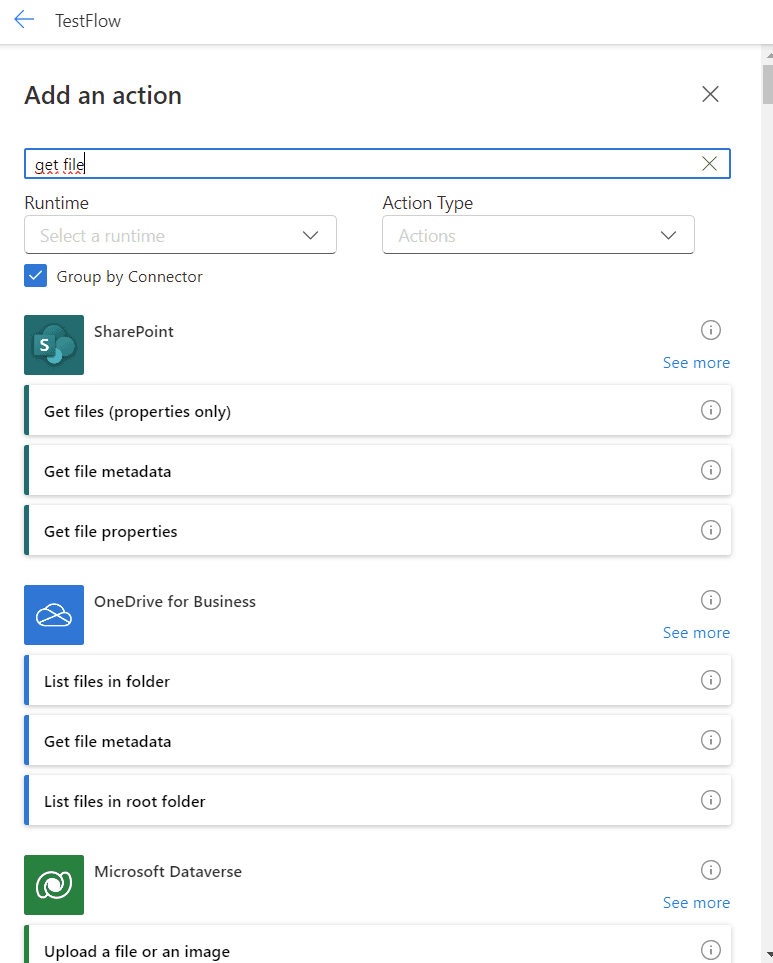
- From the search results, we select "Get file properties" under the SharePoint category.
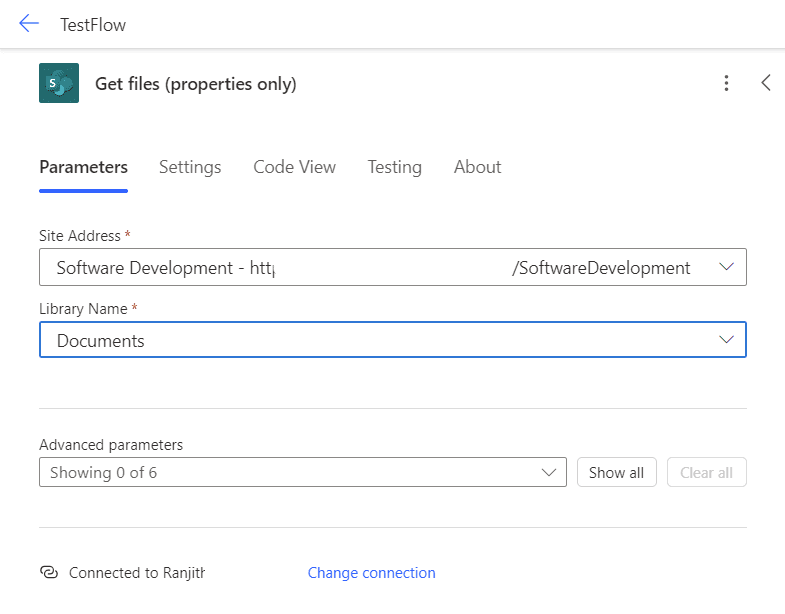
Now, let us configure this action:
- Select the SharePoint site and the folder you want to sync.
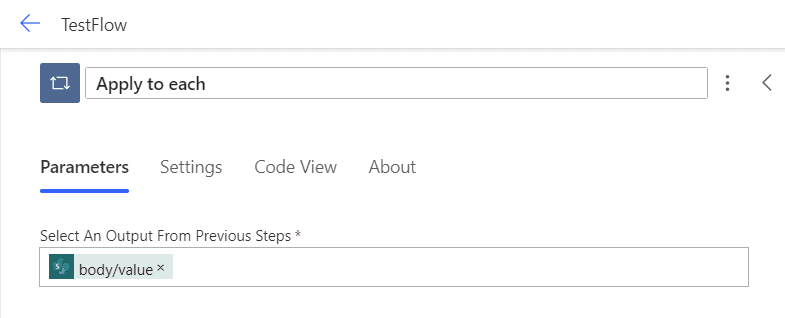
Apply to Each
After getting the file properties, we'll use an "Apply to each" action to process each file individually.
- Add a new step and let us search for "Apply to each".
- In the "Select an output from previous steps" field, we'll see a lightning bolt (⚡) icon. This is the "dynamic content" picker (the "blitz symbol"). The symbol below allows us to enter expressions.
These symbols (⚡ for dynamic content and for expressions) will appear throughout the rest of the flow creation process. They're essential for connecting steps and for working with our data.
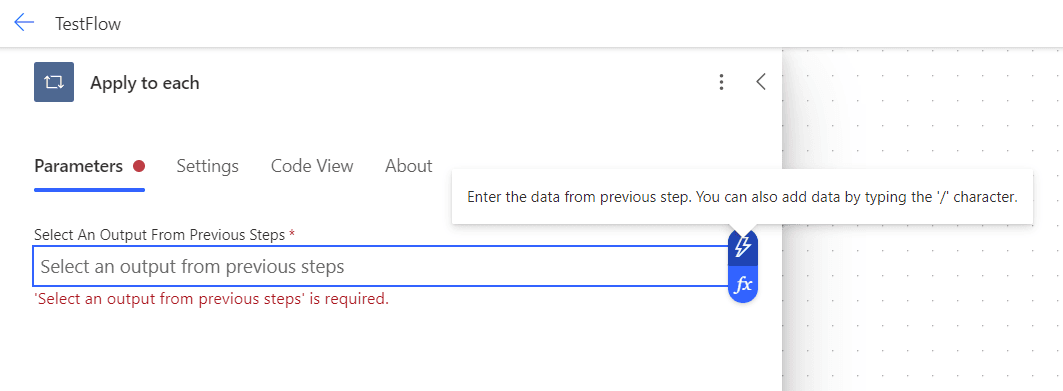
Clicking this icon opens a menu that allows us to select data from previous steps in your flow. For our "Apply to each" action, we want to select the "value" from the "Get file properties" step.
- Use the ⚡ (blitz symbol) when you want to use data directly from a previous step.
- Use the symbol when you need to write an expression to manipulate or combine data.
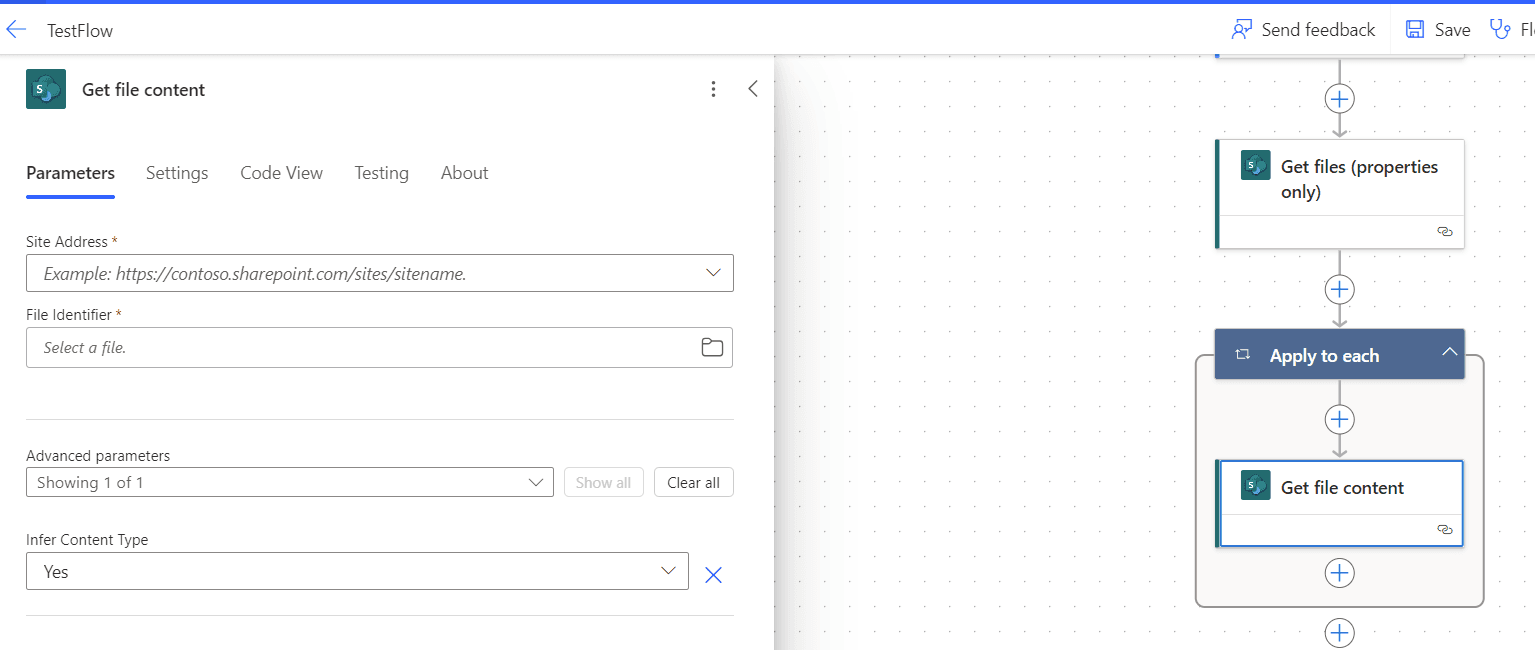
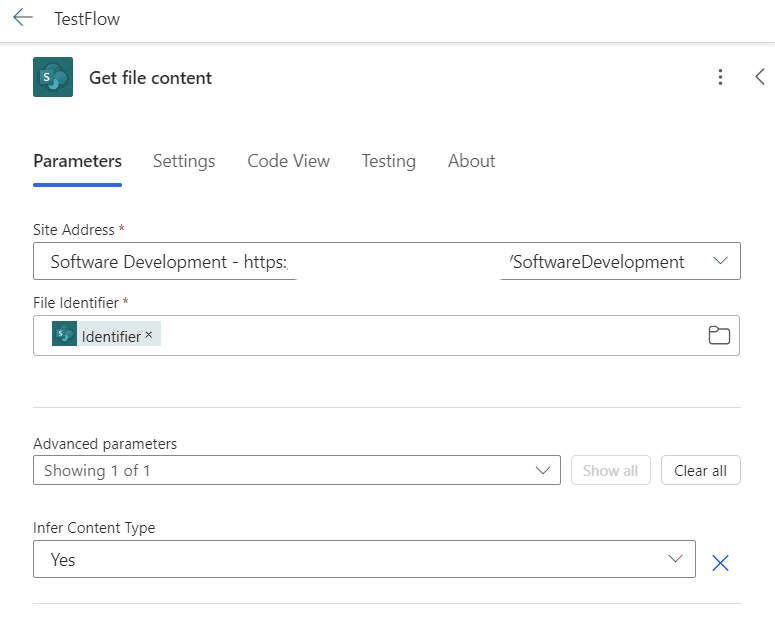
Get file Content
Inside the "Apply to each" loop, we'll get the content of each file.
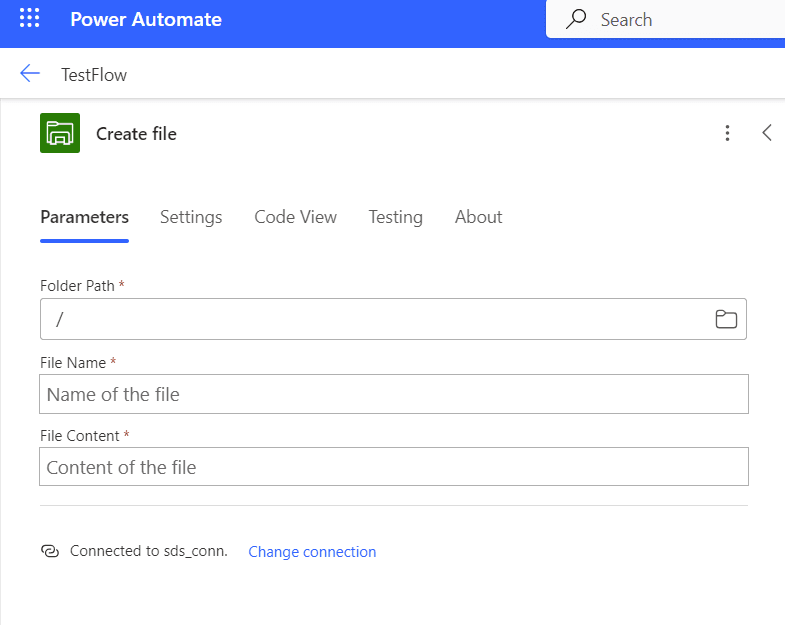
Create File in Local Folder
Finally, we'll create each file in our local Windows folder. This step requires us to use a local gateway, which allows Power Automate to interact with resources on your local network or computer.
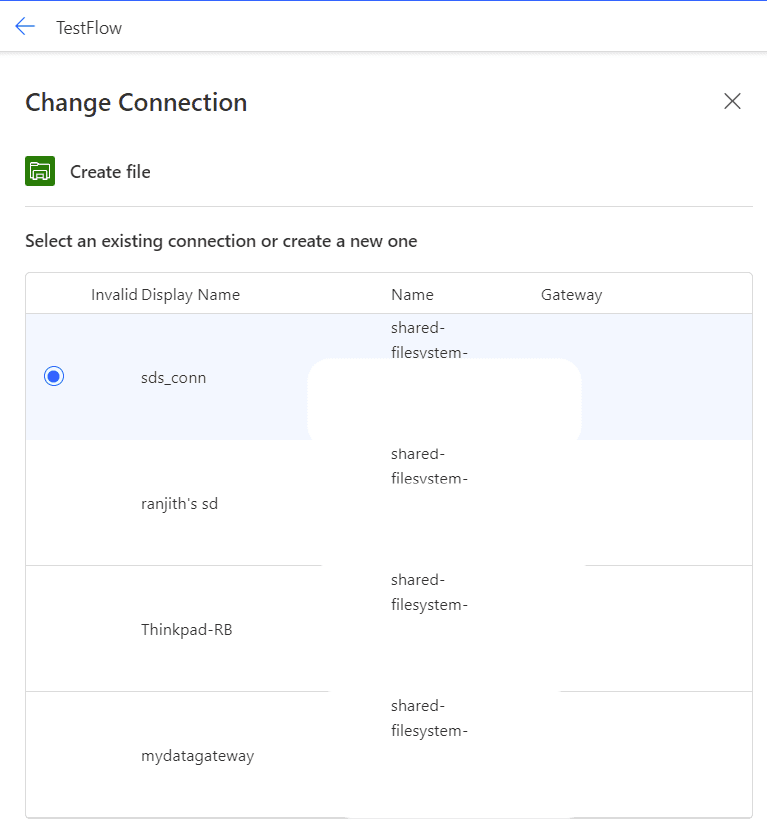
- Add a "Create file" action.
- By default, this action might be set to use a cloud-based connection. We need to change it to use a local gateway -Select "Change connection" from the bottom. I named my gateway as
mydatagateway. So, I switched connection tomydatagateway. In your case, you should be able to see your on-prem gateway connection name that you have configured earlier.
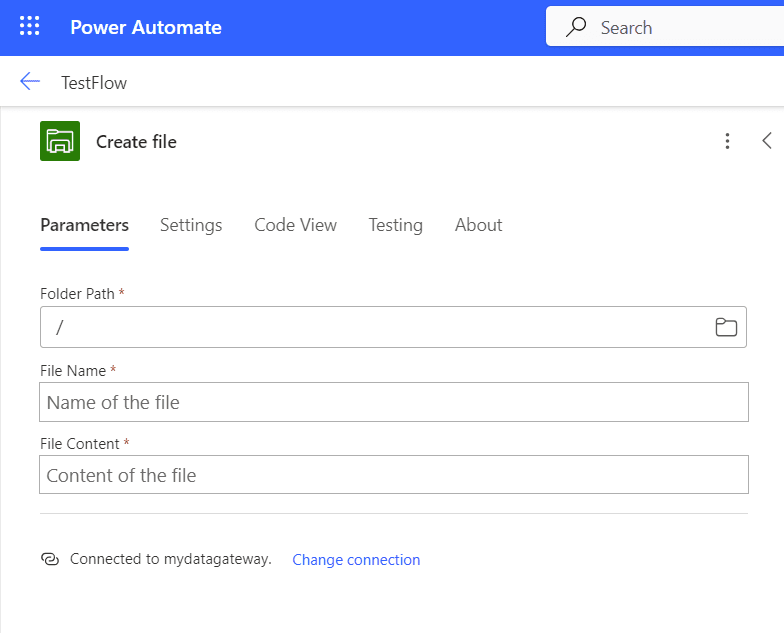
After selecting the local gateway, you'll see the connection has changed.
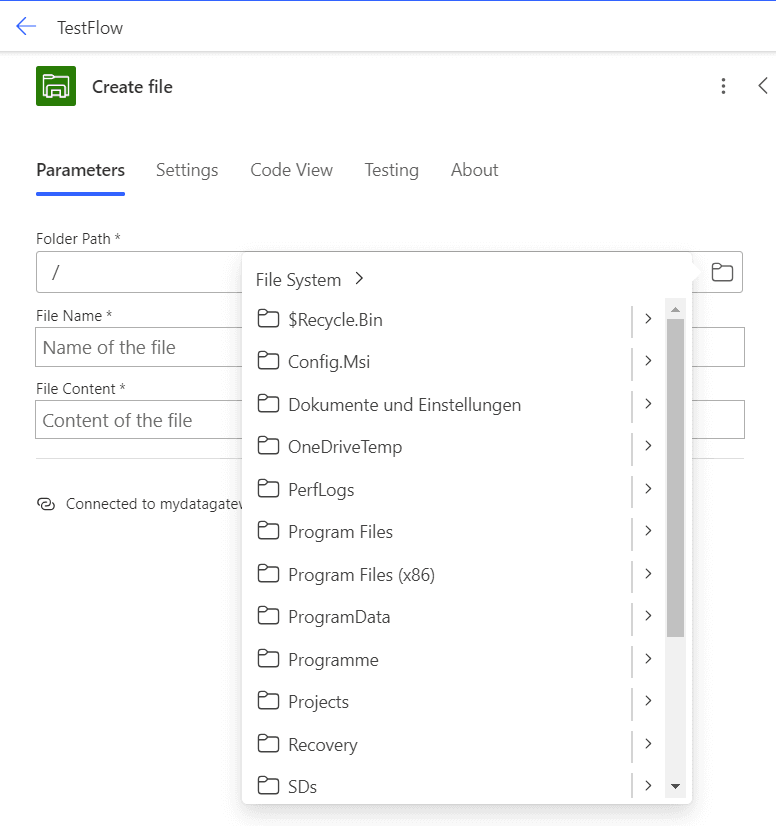
- Now you can select a folder on your local machine where the files will be saved. I choose to save them in Downloads folder.
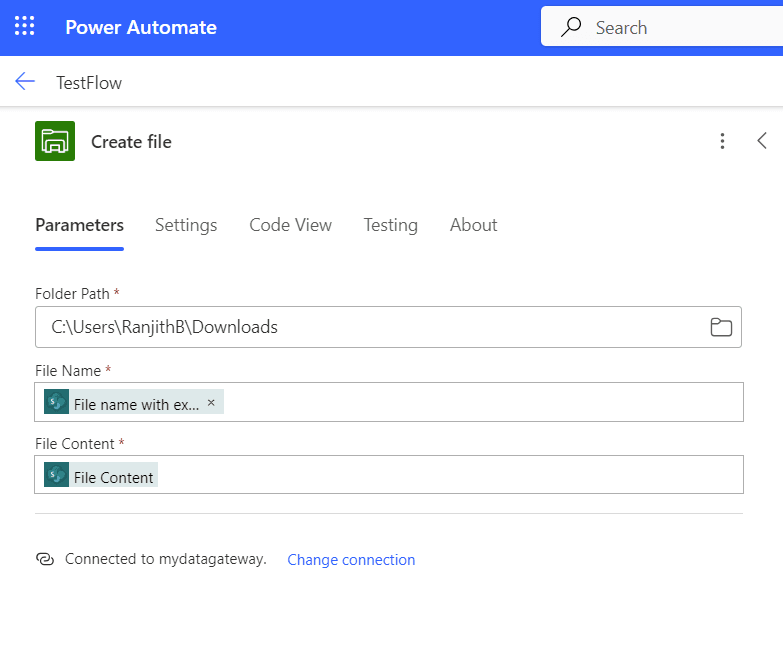
For the "File name", click on the ⚡ (dynamic content) icon. Let us use the original file name from SharePoint. So, We Look for "Name" or "File name" from the "Get file properties" step. We select File content as 'File Content' of Sharepoint.
Tip: Using Functions in Power Automate
Power Automate provides a wide range of functions that you can use to manipulate data. Here's an example of how you might use functions to modify the file name:
Suppose you want to remove the last three characters from each file name (perhaps to strip off a file extension). You can use a combination of functions like this:
@{substring(items('Apply_to_each')?['Name'], 0, sub(length(items('Apply_to_each')?['Name']), 3))}
Let's break this down:
items('Apply_to_each')?['Name']gets the original file name.length()function calculates the length of the file name.sub()function subtracts 3 from the total length.substring()function extracts a portion of the string, starting from index 0 and ending at the calculated length minus 3.
So, if your original file name was "document.txt", this expression would return "document". You can use this in the "File name" field of your "Create file" action
Now that we have all our actions setup and configured, Here is our complete flow that we developed:

Fig: Complete Flow
Now, let us save the flow and run it. Upon successful run, we should be able to see the files have been synced successfully.
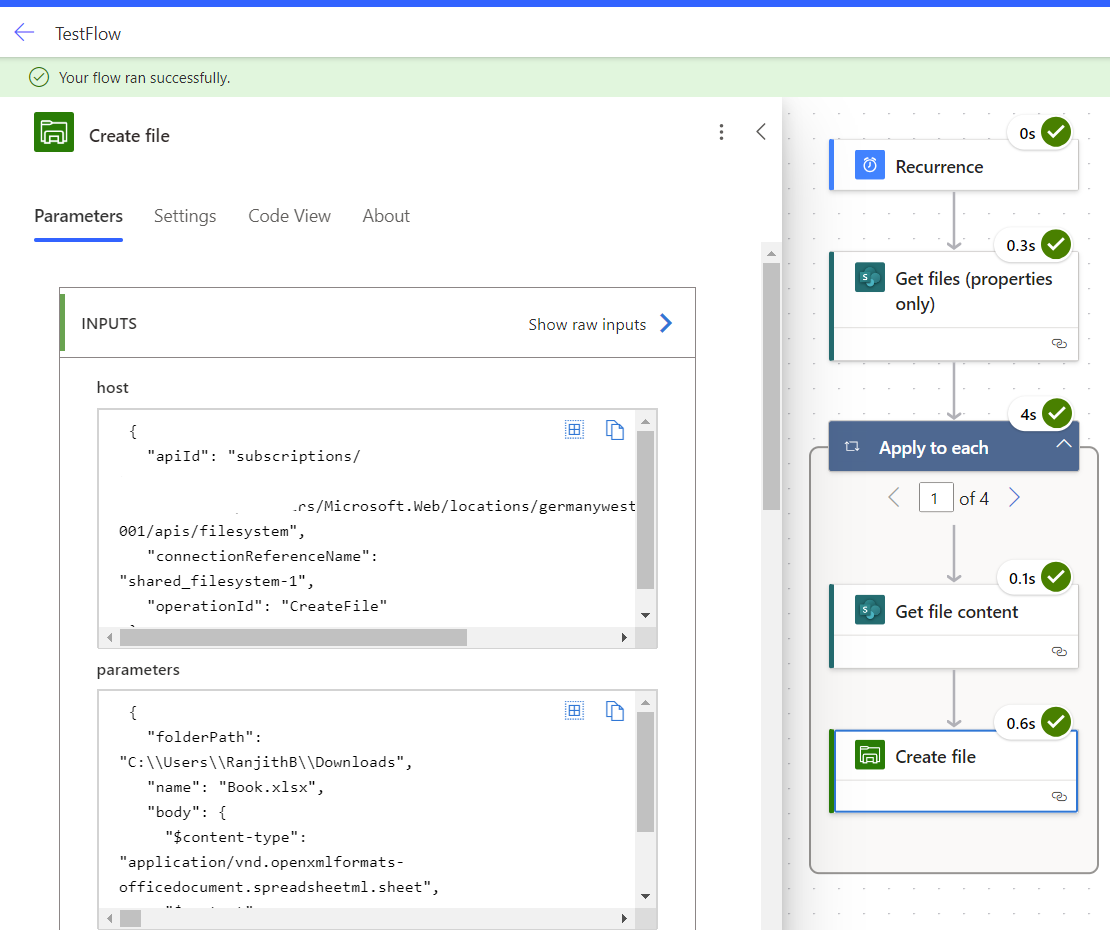
Fig: complete flow in code view: Tests passed
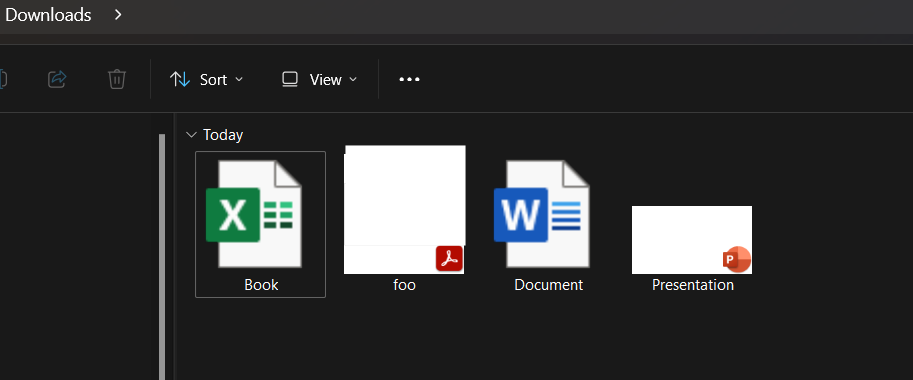
Fig: Windows PC: Downloads folder
Congratulations! We've now sucessfully created a Power Automate flow that syncs Sharepoint files to a local Windows folder. This flow will run automatically based on the schedule we've set.